Monday 26 February 2018

Tantalisingly close to finishing

Panel 2 has now been finished, with the final cutting of the excess organza.


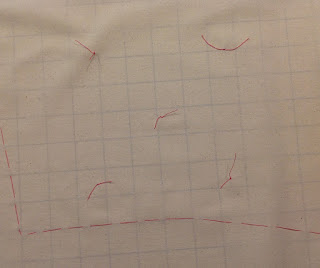
As mentioned in the previous post I take extreme precautions with this final finishing part of the panel by stitching lengths of waste stabiliser all round the edge of the panel. This not only gives the scissors something solid to cut through but also provides a platform to mark out the correct distance from the boundary stitch. After the line has been drawn I stitch it with a red thread which is easy to see when cutting away the excess organza.
I find  it invaluable to make detailed notes of the processes I use as it is very easy to forget exactly how I achieved the end result of a project. It is a discipline that I have adopted since my degree years at Winchester School of Art.


It was very satisfying cutting away the excess fabric and finally seeing how this panel will hang. The lace panel has also been trimmed but it is a very difficult piece to photograph, so I hope it will be easier to work with when I have all the panels together ready for the final photoshoot.  


The lovely jute twine has made a great rope for the last panel especially when I decided to soften it by soaking it in a soft washing liquid before attaching it to the organza. 


I've decided to use the the driftwood sticks that I found for hanging the panels as it very simple and and will work well with the jute twine that I've used for the rope on panel 3. I've used a mock panel here with pieced organza waste.


Monday 29 January 2018

Slow Progress


Due to the Christmas break and winter bugs, progress on the project has been slow over the past 2 months, but I'm slowly moving towards the final consolidation and am looking forward to preparing the piece for hanging.


All the figures have now been hand embroidered and by the time I'd reached the last one I was relatively proficient in hiding the start and finish knots.


I decided it was time to cut the excess fabric from the lace panel, and as I wanted to get as close as possible to the border, I took careful precautions to make sure that the cutting line would be accurate.


As you can see I made sure there was enough stabiliser to cover the cutting line on the sharpest point of the panel.


At last I was able to take some images of the lace embroidery in close up.


Having finished the lace sail I returned to the completed hand stitched figures and looked at ways of creating the rope that they are all pulling.


None of these ideas  seemed to work, but after having a rethink regarding the twine that I had already used for the hanging device, I discovered some Jute twine in a local garden centre which is perfect, (for the hanging device). I hope it will work well for the figures.

I really like everything about this twine, it’s the perfect weight, it's rustic, it takes the silk embroidery thread perfectly for whipping the loop into place.


Tuesday 12 December 2017

Starting to consolidate the project

I've reached the stage now where I’m working on all 3 panels of the Lady launchers project, which is quite a satisfying place to be.


The second panel is now finished and just waiting for the stabiliser to be removed. I was very pleased that the border stitch worked well and provides an unobtrusive frame for the embroidery. I'm also very pleased at how the eyelets have worked and am looking forward to making and attaching the hanging device.


The third panel is now ready for the hand embroidery to be completed using running stitch with hand dyed silk thread. The most time consuming part of this process is starting and finishing with a concealed knot. As the organza is transparent and is the end panel of the three, it will be seen from behind when it is displayed.


You may notice that the original figure drawings have been replaced with the new paired down outlines. 


It was quite difficult to make sure that the figures were correctly posed, so I decided the best way to do it was to line the whole design up on a central line that could be matched to a line on the cutting board. As you can see the second figure in the row needed a small amount of tweaking


First figure completed 


By way of a distraction from the intensity of this project I decided to create a small piece with some vibrant colour. The idea for the design has been derived from a fabric wall hanging that I noticed when I was visiting the  Weald and Downland Living Museum  in Sussex.


I started by copying a photo of the design and then importing it into the sketching app Sketchbook Pro. I was then able  to add colour which could  be removed instantly if it wasn't right.


Once I was happy with the 2 colour pallets I then changed the original grey background to a cream as I intend to use calico for the background fabric. I think the technique I use for this piece will be digital appliqué and digital embroidery for the smaller details. 

Thursday 26 October 2017

Alternative thinking


I've recently been away from my studio for a couple of weeks, so in order to keep up my progress on the Dungeness Lady Launchers piece I decided to try some experimentation.

Last year I had an interview with Professor Lesley Millar  with a view to applying for a place on the MA textile course at the UCA in Farnham Surrey. She was extremely helpful and selected one sketch in particular as her favourite amongst the content of my sketchbook.


It's the bottom sketch on the LH page.

I was successful in gaining a place on the course, but sadly had to decline the offer as I could not raise the funding for it.

My original idea was to show the ladies pulling on the launching rope in a literal representation.


Being separated from my sewing machine I decided to try a more contemporary approach and revisited some of my earlier sketches.


The hand embroidered sample below caught my attention and I decided to use it for a trial.


The proportions were much smaller than I needed so I had to size up each figure, keeping it in proportion so that the figures would be smaller as they receded into the distance.


I worked all the sketches in running stitch on silk organza, which is my fabric of choice for all three panels.


This is a very quick trial, but already I can see the benefit of thinking beyond the obvious. 
I also used the time away from my familiar surroundings to think about how I would support each sail in the ‘window frames’ that will be used to display each piece individually.


In the above image you will see my favourite sample, using fine twine, doubling each strand, which was then plaited, passed through the eyelet and then whipped into place.

It was quite a fiddly process and it took several attempts to find the best way to support the twine.


Tuesday 26 September 2017

Moving towards the finished project

After a great deal of difficulty I finally managed to remove the stabiliser from the lace panel. As there were so many layers involved there were places on the design that took a great deal of persuasion to dissolve. 


There were several areas, as seen in the image above, that had been stitched over 3 or 4 times and each one had to have the registration threads tied so they didn't fall out, which resulted in a very tangled mess.
As I have mentioned several times during this project, it has been a very steep learning curve and there are many things I would change about the process in the future.


The above images are a small preview of the design where the stabiliser has been removed.


Having soaked the lace in tepid water in the bath I then used various methods for removing the reaming glue like substance. There is still some work to be done before the panel is as clean as possible, so I decided to move on to the portraits for a diversion.


From the beginning of this project I decided I wanted to partly cover the faces, as I felt that although the women who launched the life boats were a vital part of the process, there had been very little documentation about the role they played. It took a while to discover how to achieve this until I remembered how many women wore head scarves. After a great deal of experimentation I designed a facsimile of the scarves flying in the wind, which is almost a continuous feature on the Dungeness peninsular.

The image above shows a possible placement of the three portraits I decided to use, 2 of which have been stitched and the final one on the right hand corner is a printout of the third. 


In the above image you can see that the portrait arrangement has been changed as I felt it was more comfortable reading from left to right diagonally.


In order to place each image in the correct place a copy of the portrait was printed showing the centre point and 6 other reference points.


The paper guide is placed under the embroidered portrait (on top of the calico) and lined up. There is a very slight discrepancy as the silk organza and thread shrink by a small amount when the stabiliser is washed off.


The embroidered portrait can now be removed and the reference points are stitched onto the calico.


In order to make placing the hoop easier I decided to tack the stabiliser to the calico first.


The grid was then placed in the hoop and the reference marks were lined up.


The process was repeated on all three portraits.